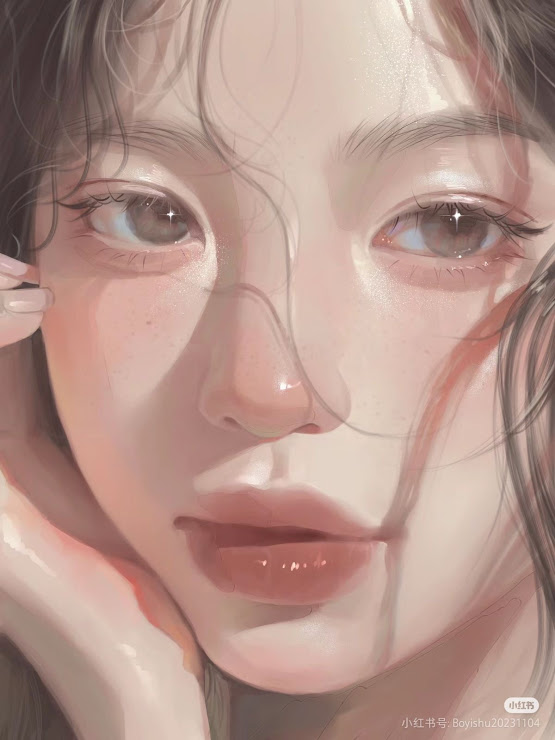
Read More

Rendering Hacks

Rendering Hacks
Read More

Custom Brush

Create Custom Brushes
Read More

Light Effects

Ways to Light Effect
Read More

Hacks

Experimenting with Ibis materials
Read More

Another Light Effect

Soft Glow Magic

Showing posts with label Features. Show all posts

2/1/25

☆ Watercolor-like Artstyle


☆How to create a watercolor-like texture in Ibis Paint X

Cr pic : lizzy on Pinterest 

Hello everyone! Nai’s here. Today, let’s explore how to create a watercolor-like texture in Ibis Paint X to add a traditional, artistic feel to your digital artwork.

1. Using the Wet Edge Filter

Ibis Paint X offers a “Wet Edge” filter that simulates the natural spread and edge darkening of watercolor paint.

Steps:

  1. Prepare Your Base Illustration:
  • Create or open the artwork you want to enhance with a watercolor effect.
  1. Apply the Wet Edge Filter:
  • Select the area where you want to apply the effect.
  • Tap on the “Filter” tool.
  • Choose “Wet Edge” from the list of filters.
  • Adjust the width and strength sliders to achieve the desired watercolor effect.
  •  Tap the checkmark to apply the filter.

This method allows you to add a watercolor-like texture to specific areas of your artwork, giving it a more organic and traditional feel. 

By following these steps, you can create beautiful watercolor textures in Ibis Paint X, enhancing the depth and expressiveness of your digital art. Happy painting!

For a visual demonstration, you can watch the following tutorial:

https://ibispaint.com/lecture/index.jsp?lang=en&no=68&utm_source=chatgpt.com


Read More

☆ Creating Custom Brush


 ✩Creating Custom brush

Hello everyone! Nai’s here. Today, let’s explore how to create and use custom brushes in Ibis Paint X to add unique textures to your artwork. Custom brushes allow you to achieve special effects like skin textures, hair, or other elements that match your artistic style.

1. Creating a Custom Brush

Steps:

  1. Select a Base Brush:
  • Open Ibis Paint X and create or open your project.
  • Tap the brush icon to open the brush menu.
  • Choose a brush that you want to use as the base for your custom brush.
  1. Adjust Brush Parameters:
  • Tap the settings icon (gear icon) next to the selected brush.
  • Modify parameters such as thickness, opacity, and brush tip shape to your liking.
  • To add texture, you can change the brush pattern or add an image as a texture.
  1. Save as a Custom Brush:
  • Once satisfied with the settings, tap the “+” button to add the brush to your custom brushes list.

2. Using Custom Brushes to Add Texture

Example: Adding Skin Texture

  1. Select the Custom Brush:
  • Open the brush menu and choose the custom brush you’ve created for skin texture.
  1. Apply the Texture:
  • On a new layer, use the custom brush to add texture to the desired skin areas.
  • Adjust the brush size and opacity as needed to achieve the desired effect.
  1. Final Adjustments:
  • Use the eraser tool with low opacity to smooth out areas that are too prominent.
  • You can also use blending modes on the layer to better integrate the texture into your artwork.

3. Importing and Exporting Custom Brushes

Importing Brushes:

  1. Obtain a QR code or brush file from a trusted source.
  2. In Ibis Paint X, open the brush menu and tap the import icon.
  3. Scan the QR code or select the brush file to import it into your app.

Exporting Brushes:

  1. Select the custom brush you want to share.
  2. Open the brush settings and choose the export option.
  3. Save the QR code or brush file and share it with your community.

By following these steps, you can easily create, use, and share custom brushes in Ibis Paint X to add unique textures to your artwork. Happy creating, and may your art become even more expressive!

For a more detailed explanation, you can watch the following tutorial:


https://ibispaint.com/lecture/index.jsp?no=104


Read More

✩Ways to Layering


✩Lazy Artist’s Guide: How to Use Layering the Easy Way in Ibis Paint X

Hey there! Nai’s here, and if you’re anything like me, you love creating art but don’t always have the patience to spend hours on complicated techniques. That’s why today, I’m sharing one of the easiest ways to make your digital art look more polished—without the extra effort. The secret? Layering!

Ibis Paint X has a powerful layer system that can help you shade, highlight, and add depth to your artwork without having to repaint everything manually. The best part? You don’t need to be a pro to use layers effectively! Let’s break down some simple, lazy-friendly layering techniques that’ll make your art look amazing with minimal work.

1. Use Multiply Layers for Instant Shadows

  • What it does: Multiply layers darken whatever is underneath them, making them perfect for quick and easy shading.
  • How to use it:
  1. Create a new layer above your base colors.
  2. Change the blending mode to Multiply (you can find this in the layer settings).
  3. Use a soft airbrush with a slightly darker color to add shadows—boom, instant depth!
  • Pro Tip: Don’t use pure black for shading—it can look too harsh. Instead, try using a darker version of your base color (like deep purple for skin or navy blue for hair) for a softer effect.

2. Add a Soft Glow with “Add” or “Screen” Layers

  • What it does: These layers brighten your artwork and make highlights pop effortlessly.
  • How to use it:
  1. Create a new layer on top of your art and set the blending mode to Add (or Screen for a more subtle glow).
  2. Use a soft airbrush and a light color (white, yellow, or pink) to add highlights.
  3. Gently paint over areas that would naturally catch the light, like hair, cheeks, or accessories.
  • Pro Tip: Want that dreamy, ethereal glow? Lightly blur the highlight layer to make it blend seamlessly!

3. Use Clipping Layers to Avoid Messy Coloring

  • What it does: Clipping masks let you color inside the lines without worrying about ruining your base layer.
  • How to use it:
  1. Place a new layer above your base color layer.
  2. Tap the layer and select Clipping—this will lock your strokes to whatever is below it.
  3. Now you can shade, highlight, or add details without going outside the lines!
  • Pro Tip: Clipping masks are great for adding textures, like soft blush, clothing patterns, or light reflections.

4. Overlay Layers for Vibrant Color Effects

  • What it does: Overlay layers add richness and vibrancy to your colors, making them look more alive.
  • How to use it:
  1. Create a new layer on top of everything and set it to Overlay.
  2. Use a warm color (like orange, red, or pink) to add warmth, or a cool color (like blue or purple) for a moody effect.
  3. Lightly brush over areas to enhance the mood and lighting of your piece.
  • Pro Tip: If the effect is too strong, lower the opacity until it looks just right.

5. Lock Alpha for Easy Color Adjustments

  • What it does: Locking alpha means you can repaint an area without affecting the transparent parts of the layer.
  • How to use it:
  1. Select the layer you want to edit.
  2. Tap Lock Alpha (found in the layer menu).
  3. Now, when you paint, the colors will only affect the existing strokes—perfect for quickly adjusting shading or adding highlights!
  • Pro Tip: This is super useful for refining line art, recoloring, or fixing areas without making a mess.

Final Thoughts

And that’s it! These simple layering techniques can save you so much time while making your artwork look polished and professional. Whether you’re adding shading, highlights, or color adjustments, using layers the lazy way can seriously level up your art without the extra work.

So, if you’ve ever felt intimidated by layers, don’t worry! Just start with these easy tricks, and soon, you’ll be layering like a pro—with half the effort.

Happy drawing, and remember: work smarter, not harder!


Read More

✩ Ibis Filters (Fx)

 ✩Lazy Artist’s Secret: How to Use Ibis Paint X’s Filters for Quick Results

Hey there! Nai’s here, and today I’m going to share one of my favorite secrets for making artwork look fantastic with minimal effort. As a “lazy artist,” I know the struggle of wanting to create beautiful art without spending hours on every tiny detail. But don’t worry, there’s a way to get great results in less time—and the key to doing that in Ibis Paint X is through the magic of filters!

Cr pic : Pinterest 

Ibis Paint X is packed with built-in filters that can instantly enhance your artwork. Whether you’re looking to add atmosphere, smooth out textures, or create stunning lighting effects, filters can help you do it all without stressing over every brushstroke. Let’s dive into how you can use filters to elevate your work the lazy way!

1. Gaussian Blur: Softening and Blending for a Smooth Effect

  • What it does: The Gaussian Blur filter helps smooth out harsh lines, blend colors, and create a soft focus effect that makes your art look polished in seconds.
  • How to use it: If you want to soften a background or blend colors together, simply duplicate your background layer, apply Gaussian Blur (found in the “Filter” menu), and adjust the blur strength to your liking. It’ll give your piece a dreamy, ethereal look with very little effort.
  • Pro Tip: Use a slight blur on your background and keep your foreground sharp for a cool depth-of-field effect that looks way more complicated than it actually is!

2. Noise: Adding Texture Without the Effort

  • What it does: The Noise filter adds a grainy texture to your artwork, which can give it a more organic, imperfect feel—perfect for when you want to make your work look like it has more depth.
  • How to use it: Apply the Noise filter to any layer (it works great on backgrounds or skin tones) and adjust the strength. You’ll get an instantly textured effect that would take you ages to paint manually.
  • Pro Tip: Try applying noise on a new layer set to a lower opacity for a subtle texture effect that still enhances your piece without taking over.

3. Blur & Light Effects: Creating a Dreamy Glow

  • What it does: Filters like “Radial Blur” or “Motion Blur” can be used to create light trails or glowing effects that make your art look more dynamic and magical.
  • How to use it: If you want a glowing, dreamy effect around a character or object, apply the Radial Blur and focus it on the area you want to emphasize. You can also use the Motion Blur for glowing light effects in backgrounds or skies.
  • Pro Tip: Combine these with the “Add” blending mode to enhance the glow, or use the “Screen” mode for a softer effect!

4. Soft Light: Quick Shading and Highlights

  • What it does: The Soft Light filter adds gentle shading and highlights to your artwork, making it look like you’ve spent time perfecting lighting, even if you haven’t.
  • How to use it: After you finish your base colors, add a new layer and set it to Soft Light. Then, paint with a soft airbrush or gradient tool to add lighting and shadows quickly. This creates depth and atmosphere with minimal effort.
  • Pro Tip: Use a pale color or white for highlights, and a soft dark color for shading to keep it looking natural.

5. Pixelate: For a Cool, Retro Effect

  • What it does: The Pixelate filter gives your artwork a retro, pixelated effect, which can be perfect for adding a bit of fun to your work or for creating a distinct, stylized look.
  • How to use it: Apply the Pixelate filter to any layer and adjust the size of the pixels. It can be used for backgrounds, characters, or even abstract pieces.
  • Pro Tip: If you’re aiming for a stylized look but don’t want the effect to overwhelm your art, use the Pixelate filter subtly and in small areas.

6. Vignette: Adding Focus and Depth

  • What it does: The Vignette filter adds a soft, darkened edge around your art, helping to focus attention on the center and creating a cinematic atmosphere.
  • How to use it: Simply apply the Vignette filter to your artwork and adjust the intensity. It’s perfect for creating a sense of drama or for guiding the viewer’s eye towards the focal point.
  • Pro Tip: Use Vignette subtly so it doesn’t overpower the scene. It works best for portraits or scenes with a central focus.

Final Thoughts

There you have it—my lazy artist’s secret to making your art look stunning without spending all your time on it! Filters in Ibis Paint X are a total game-changer, giving you the ability to quickly enhance your work with just a few taps. Whether you want a dreamy, glowing effect or a textured, gritty look, these filters can save you a ton of time and still give you impressive results.

So, the next time you want to create something magical but don’t have the energy to go into full detail mode, just reach for your filters. Trust me, you’ll get beautiful results with minimal effort!

Happy drawing, and don’t forget to have fun while you’re at it!


Read More

✩ Blending Mode Magic!


✩Understanding Blending Modes in Ibis Paint X

Hai there! Nai’s here, and this is my another artwork! This time, I played around with lighting and a futuristic theme, combining warm and cool tones to create a glowing cyber-inspired effect. The background features floating digital screens, reflecting modern technology and social media. To enhance the lighting and colors, I used different blending modes in Ibis Paint X—let’s break them down so you can use them in your own artworks too!

✩What Are Blending Modes?

Blending modes in Ibis Paint X let you change how a layer interacts with the layers below it. Instead of just stacking colors, you can create cool effects like glows, shadows, tints, and color burns. Each mode affects the colors differently, so it’s fun to experiment and find the best combination!

✩Types of Blending Modes & How to Use Them

1. Add & Add (Glow) – Perfect for Light Effects

This mode makes things brighter and is great for adding glowing effects! In my artwork, I used multiple Add layers (see layers 32 and 33) to enhance the neon blue lights and the warm glow on the character’s skin.

How to use:

  • Set a new layer to Add (Glow).
  • Use a soft airbrush with a light color (like yellow, white, or neon blue).
  • Paint over areas you want to glow, like light sources, reflections, or highlights.
  • Adjust opacity if it’s too strong.

2. Multiply – Deepens Shadows

Multiply darkens the colors underneath it, making it perfect for shading. I used Multiply on the character’s face and clothing to create deeper shadows.

How to use:

  • Create a new layer above your base colors.
  • Set it to Multiply and pick a darker shade of your base color.
  • Softly shade where shadows naturally fall.

3. Color Burn – Adds Intense Shadows & Mood

Color Burn makes colors richer and adds contrast, which is useful for dramatic lighting. In my artwork, I set Layer 34 to Color Burn at 22% opacity to enhance depth.

How to use:

  • Use with deep reds, purples, or blues to add strong shading.
  • Lower the opacity for a subtle effect.

4. Divide – Creates a Soft, Dreamy Look

Divide lightens and inverts colors, often creating a pastel-like or glowing effect. You can see Layer 31 is set to Divide, giving the character’s highlights a soft, glowing edge.

How to use:

  • Use it for ethereal highlights or to create a holographic look.
  • Works well with light or neon colors.

5. Screen – Soft & Natural Glow

Screen brightens but in a softer way than Add mode. It’s great for adding highlights on the skin or hair without making it too intense.

6. Overlay – Enhances Colors & Contrast

Overlay is great for adding warmth or coolness to your entire artwork. If you want to unify colors, try adding an Overlay layer with a soft gradient.

Final Tips for Using Blending Modes

  • Stack multiple blending mode layers for complex effects. In my artwork, I used Add layers for glow, Multiply for shadows, and Divide for extra contrast.
  • Adjust opacity to make the effects blend naturally.
  • Experiment! Sometimes unexpected combinations create the coolest results.

Wrapping Up!

Blending modes are a powerful tool in Ibis Paint X that can transform your artwork, whether you want glowing lights, deep shadows, or smooth color transitions. I hope this breakdown helps you experiment and find your own style!

Let me know if you try it out—what’s your favorite blending mode?


Read More

Social Profiles

Twitter

Get to know the creator

Blog Profile

My photo
Hai there! i'm nai, and currently a highschool stud on my senior year

Popular Posts

Categories

Blog Archive

Search This Blog

Powered by Blogger.

Pages - Menu

Recent Post

☆ Way To Skin Texture

Copyright © The Lazy Artist’s Guide to Digital Art Hacks (Ibis Paint x) | Powered by Blogger
Design by Lizard Themes | Blogger Theme by Lasantha - PremiumBloggerTemplates.com