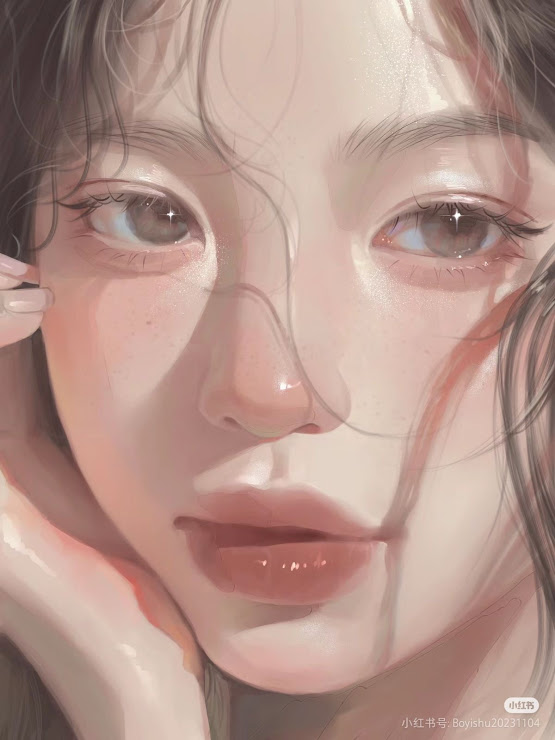
Read More

Rendering Hacks

Rendering Hacks
Read More

Custom Brush

Create Custom Brushes
Read More

Light Effects

Ways to Light Effect
Read More

Hacks

Experimenting with Ibis materials
Read More

Another Light Effect

Soft Glow Magic

Showing posts with label Light effect. Show all posts

2/1/25

☆ Neon Light Effect


☆ Neon Light Effect 

Cr Art : Pinterest 

Hello everyone! Nai’s here. Today, let’s explore how to add striking neon light effects to your illustrations using Ibis Paint X, giving them a futuristic touch.

1. Preparing Your Artwork

Before adding neon effects, ensure your base illustration is ready.

Steps:

  • Complete the Base Drawing: Finish your line art and base colors.
  • Organize Layers: Keep elements you want to enhance with neon effects on separate layers for easier editing.

2. Creating the Neon Effect

Now, let’s add the neon glow to your illustration.

Steps:

  1. Select the Element:
  • Choose the layer containing the part of your illustration you want to apply the neon effect to.
  1. Duplicate the Layer:
  • Duplicate this layer to preserve the original.
  1. Apply Outer Glow Filter:
  • With the duplicated layer selected, go to the Filter menu.
  • Choose “Glow (Outer)” from the Style filters.
  • Adjust the radius to control the glow’s spread.
  • Select a vibrant color for the glow to achieve the neon effect.
  1. Enhance the Glow (Optional):
  • To intensify the neon effect, you can duplicate the glowing layer multiple times.
  • Experiment with different blending modes like “Add” or “Screen” to achieve the desired brightness.

3. Refining the Effect

Fine-tune the neon effect to make it more realistic.

Steps:

  • Adjust Opacity: Lower the opacity of the glow layers if the effect is too strong.
  • Add Highlights: On a new layer, use a soft brush to add subtle highlights around the neon-lit areas to simulate light reflection.
  • Color Balance: Ensure the neon color complements the overall color scheme of your illustration.

By following these steps, you can effectively create eye-catching neon light effects in your illustrations using Ibis Paint X. Happy drawing!

For a visual demonstration, you can watch the following tutorial:


https://youtu.be/otqHHxESrAc?si=FFDxohSQANDiY6nq


Read More

✩ Soft Glow Effect


 ✩Soft Glow Magic in Ibis Paint X

Hey everyone, Nai’s here! Today, I’m sharing a little trick to create that soft, glowing effect in your art. Just a heads-up, this isn’t my artwork, it’s a piece I found on Pinterest. The illustration is inspired by the “alien stage” concept, its actually music videos with story inside it and its sooo good. In this artwork is one of the characters Luka, my fav!. The glowing effect really brings that healing, ethereal vibe, like the character is bathed in the last light of a setting sun after going through something intense.

If you’ve ever wanted to create this magical, glowing effect in Ibis Paint X, here’s a simple guide to get you started!

How to Add a Soft Glow Effect

1. Duplicate Your Line Art & Blur It

  • Start by duplicating your line art layer.
  • Apply a slight Gaussian Blur (found under the “Filter” menu).
  • Lower the opacity a little so it blends smoothly with the original.

2. Use the “Add” Blending Mode

  • Create a new layer above your artwork.
  • Change the blending mode to Add (or Screen for a softer effect).
  • Use a soft airbrush to paint the areas where you want the light to shine brightest—think hair, skin highlights, or a background glow.

3. Color Dodge for Extra Shine

  • For more intense highlights, try using the Color Dodge blending mode.
  • Pick a pale yellow or white and gently brush over the brightest areas to make them pop.

4. Softening with Overlay Layers

  • If the glow looks a bit too harsh, add a new layer and set it to Overlay.
  • Pick a warm, soft color and lightly paint over the glowing areas to blend it into the scene more naturally.

5. Final Touches: Light Particles & Dust

  • To add a dreamy touch, use a scatter brush or soft dot brush to create little light specks around the glowing areas.
  • Lower the opacity so they blend seamlessly into the artwork.

And that’s it! A simple, effective way to add a soft, glowing effect to your illustrations. This technique works especially well for dreamy, fantasy-like portraits, and helps create that magical, atmospheric lighting.

Give it a try and let me know how it turns out! Happy drawing! Oh also don’t forget to watch Alien Stage by Vivinos and Qmeng on YouTube!


Read More

1/13/25

✩ Ways to Light Effect


Nai’s here! And what you see up here is one of my artworks. Here i want to give some tutorial about how to do light effects like this on ibis paint x.

Here’s a simple and natural tutorial for creating a light effect using the Add layer mode in Ibis Paint:


✩ How to Create Stunning Light Effects Using the Add Layer Mode in Ibis Paint


1. Set Up Your Canvas

Open your artwork or create a new canvas. Make sure the area where you want the light effect is visible and ready to work on.

2. Add a New Layer

Tap the Layer icon (looks like two squares stacked on top of each other).

Create a new layer above your artwork.

3. Change the Layer Mode to Add

Select the new layer.

Tap on the layer settings (the drop-down that says “Normal” by default).

Scroll down and select Add. This mode makes colors on the layer appear brighter and creates a glowing effect.

4. Pick a Bright Color

Tap the Color Wheel and choose a bright color like white, yellow, or a neon tone depending on the effect you want (e.g., white for a glow, blue for magic, etc.).

The brighter the color, the stronger the light effect will be.

5. Use a Soft Brush

Open the Brush menu.

Choose a soft brush, like the “Airbrush (Soft)” or “Blur Airbrush.” These brushes help create smooth, glowing edges.

Adjust the brush size to suit your design. Larger brushes are great for ambient light, while smaller ones work for details.

6. Add the Glow

Start painting on your Add layer. Focus on the areas where the light should be strongest (e.g., highlights, light sources, or glowing objects).

Build up the glow by layering strokes. You can reduce the opacity of the brush if you want more control over the intensity.

7. Refine the Effect

If the glow is too intense, lower the layer’s Opacity (adjustable in the Layer menu).

To soften the edges further, use the Blur Tool on areas that feel too sharp.

8. Optional: Add Details

Create another Add layer and use smaller brushes to add details like sparkles, flares, or streaks of light for a more dynamic look.

Use colors like white or a slightly lighter version of your base glow color.

9. Final Adjustments

Review your effect. You can add more Add layers for different parts of your artwork or experiment with blending modes like Overlay or Soft Light for additional depth.

When satisfied, merge your layers (optional) and save your work!


✩ Pro Tips

Use Gradients with Add layers for natural light transitions.

Combine Add layers with darker tones in Normal layers to create contrast and make the glow pop even more.

Experiment with the Gaussian Blur filter to soften the glow.


You’re done! With the Add layer mode, your light effects will stand out beautifully, giving your art a professional, glowing touch.


Read More

Social Profiles

Twitter

Get to know the creator

Blog Profile

My photo
Hai there! i'm nai, and currently a highschool stud on my senior year

Popular Posts

Categories

Blog Archive

Search This Blog

Powered by Blogger.

Pages - Menu

Recent Post

☆ Way To Skin Texture

Copyright © The Lazy Artist’s Guide to Digital Art Hacks (Ibis Paint x) | Powered by Blogger
Design by Lizard Themes | Blogger Theme by Lasantha - PremiumBloggerTemplates.com